New Videos from Youtube
Affichage des articles dont le libellé est Widget. Afficher tous les articles

Beautiful Recent Comments Widget For Blogger

Beautiful Recent Comments Widget For Blogger

Beautiful Recent Comments Widget : We have found a new beautiful Comments widget which will help update you about new recent comments on your Blog/Website Contents/articles.This widget is very simple and clean Blogger Widget,it will not effect your blog loading speed.This recent comments widget will be at the blog sidebar.This widget will surely show the last comments along with the title of the post.So if you are interested in adding this widget follow the below easy steps.

Live Demo of Recent Comments Widget

How to add Beautiful Recent Comments Widget To Blogger

Adding recent comment widget will help you to encourage your visitors to leave comments on your blog contents.Adding this Widget is very easy,you just have to copy a snippet of JavaScript and add into the layout section.
  • Go to Blogger.com
  • Sign in there and visit Blogger Dashboard.
  • Now Click On Layout and the click on add a widget/gadget ( as shown below in the picture).
recent-comments-widget
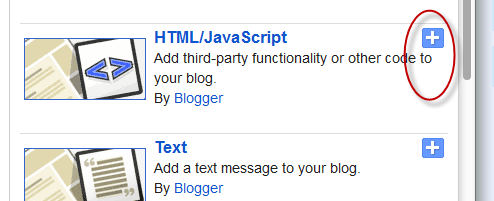
  • Now When you click on Add a Gadget a box will popup Select HTML/JavaScript from that Box(as Shown)
Html/JavaScript
  • Now Copy the below Code/Script and replace "Blog-Link" With your Own Blog URL and paste it into HTML/JavaScript Box.
Recent Comments Widget
Script Credit Goes to HelpLogger 
  • Now Just hit save and that's it :)
So What's Up:- Recent Comments Widget is a beautiful Blogger widget,actually it will show the latest comments on your blog articles.This widget is very clean and simple,i hope you will love it,If you have any question,so just ask it we are here to answer you :),stay blessed,Happy Blogging .

Recent Comments Widget With Avatars For Blogger

Recent Comments Widget with Avatars is another awesome style Comments widget,which shows the latest comments of the visitors along with round Avatars.It also shows a lil bit summary of the commenter. Actually we have posted an article which is Beautiful Recent Comments Widget For Blogger , that widget is also awesome,but the main problem with that widget is that is not showing Avatar or Profile Picture with Comments,However This Widget will show a beautiful Profile Picture or Avatar along with name and Comments.This Widget is usually placed at the footer of the blog,however you can place it in sidebar or any where in your blog.

How To Add Recent Comments Widget With Avatars To Blogger

  • Go To Blogger Dashboard >> Then Click On layout >> And Then Click On Add a gadget
  • Now a Box will popup,select HTML/JavaScript
  • Now Copy the below Code/Script and add it into the HTML/JavaScript Box.

Changes in Code Before pasting into HTML/JavaScript Box

#1) Replace/Change Blog-URL with your Own Blog URL (e.g ThatsBlogging.Blogspot.com)
#2) Replace 6 in the Code with the number of comments you want to show on the widget.
#3) If you are interested in changing the anonymous avatar, then replace "http://www.gravatar.com/avatar/?d=mm" with your own image URL.
#4) If you want to change the Avatar Size,Replace 60 with your own desired value.
#5) Now Copy the edited Code and paste in the HTML/JavaScript Box and that's it.

So What's Up:- Recent Comments Widget With Avatars is really a cute widget,i hope you liked it,must pass your views,and ask any question free.Stay Blessed,Have a nice Day,Happy Blogging.

The Code Credit Goes to @Helplogger and Harish(Way2Blogging)

Wikipedia Search Box Widget For Blogger

wikipedia-logo
image Source
I just get bore of search boxes,you may have seen many search boxes,but recently Blogger has introduce a Beautiful Wikipedia Search Box for Blogs.Actually this Search Box will help the visitors to easily search any related contents or any idea in his/her mind.This search box is actually the Wikipedia Search Box,and as we all know that Wikipedia is an ocean of  Knowledge,so One can get alot of knowledge.This search box will help your blog visitors to easily search Wikipedia articles without leaving your blog/website.I will suggest this widget for informative blogs or blog related to knowledge etc .However you can add this widget any where in the blog.


How To Add Wikipedia Search Box Widget To Blogger

Adding Wikipedia Search Box is very easy,you have to add a widget from Blog Layout Section and that's it so let's see how to do this.

  • Sign in to your blogger account
  • Now Click On layout
  • Now Click On Add a Gadget/Widget
  • A Box will pop up
  • Now take a look at the right most side
  • Click On more Gadgets Option
  • Now You will see many widgets but the Wikipedia Search Box will be at the top ( As Shown below)
wikipedia-search-box-for-Blogger
  • Now Just Click on the + Sign and that's it,your widget has successfully added.
  • Now Take a look on your blog you will see Wikipedia search Box.
  • Now If you type something for search it will seems as below picture

So What's Up:- Did you Like this Widget?How is its Look on Blog?It will help you visitors to Search Easily?Share your beautiful ideas with us :) Stay Blessed , Happy Blogging.


Add Total Posts and Comments Widget To Blogger


Its not very impressive for Pro Bloggers,but some bloggers love to show Total Posts and Comments Total Number in Blogger.Actually this widget will Show the Total No Of Comments on your Blog Articles,it fetch the total comments and Total No of Posts in your Blog.This widget is very easy to add,you can put it any where in your Blog.But the most appropriate place for adding this widget is Header or Sidebar,all you have to do is adding a Small JavaScript Code into the Layout Section.


How To Add Total Posts and Comments Widget To Blogger

  • Go To Blogger Dashboard
  • Now Click On Layout
  • Then Click On Add a Gadget
  • A Small Box will Popup,Select HTML/JavaScript
  • And Now Copy the Below Script and Paste it over there


Total Posts:

Total Comments:

Changes in the Widget Script

  • Replace "ThatsBlogging.Blogspot.com" with your Own Blog URL
  • If you are interested in Changing the Text of "Total Posts" or "Total Comments",Simply Change the Green with your Own Text.
  • You Can Also Change the Font Size and Style in the Script.
  • After changing Copy the Above Script and paste it in HTML/JavaScript Box and hit save.
  • That's it :)
So What's Up :- This is a common widget which is usually used for showing the total number of Posts and Comments on Blog.Share your Beautiful ideas with us,stay Blessed,Happy Blogging.

Add Social Sharing Buttons Widget To Blogger

Add Social Sharing Buttons Widget To Blogger
Social Media has become the main source of your Blog/website traffic,there fore never underestimate the social media networks.For Boosting Blog traffic you should add Social Sharing Buttons Widget to your Blog.Which helps you and your visitors to easily share your Blog Contents with their Friends,as a result you will get the bonus of traffic to your blog.The widget we are sharing contain Google+ Share Button,Twitter Tweet Buttons,Stumble,Facebook Send and Like Button,Pinterest,and many other social network buttons.You can add it either above the Blogger Post or Below the Blogger Posts,however it is very simple and clean widget which will not effect your Blog Loading Speed.

How To Add Social Sharing Buttons Widget To Blogger

  • Go To Blogger Dashboard
  • There Click On Template 
  • Now Search for This Script/Code
  • After Finding The above Code in Template
  • Copy The Below Script and paste it above(for Showing Buttons above The Blogger Post) or below(for Showing Buttons Below Blogger Post) this Script
   
Like the Post? Do share with your Friends.
   
  ?  
Note:-
- In Magazine Blogger Templates,there are more then two Scripts similar to ,so do paste the above Script after each script.
  • Now when you paste the above script after ,take a Preview and Then Hit save Template.
  • That's it,now take a look on your blog post social sharing widget will dancing there :)

So What's UP

Actually this widget is the main source of many blogger to get a flood of traffic,however this widget is very easy to navigate,so it will help your readers to share your blog contents with their friends.Share your beautiful ideas with us,stay Blessed Happy Blogging :)

New Expandable Recent Comments Widget For Blogger

Expandable Recent Comments Widget is a new Blogger Widget,which shows the recent comments of the readers along with the Date and Exact Time.This is very interesting widget which allows you to easily see the Contents of the Comment,Now you don't have to Click on the title link or commenter for showing the comments,just add this widget on your blog right side-bar and then you can easily navigate the comments of your readers.For expanding the Content of the comment just click the "plus +"  sign and for hiding the content of comment click the minus sign (-) or you can simply hide and show it by simply pressing Show All or hide All Button at starting time.

How To Add New Expandable Recent Comments Widget To Blogger

  • A Window will Popup Select HTML/JavaScript
  • Now Copy the Below Script and paste it into the Box


  • Replace  "http://thatsblogging.blogspot.com" with your Own Blog URL 
  • Save The Widget and that's it
So What's Up:- This was really awesome widget,we already shared many Recent Comments Widgets but this one is really attractive and accessible widget,try it and share your beautiful ideas with us,stay Blessed,Happy Blogging.Script/Code Credit @Helplogger


Stylish Sliding Up Image Description Widget For Blogger

We Got a new Widget i.e Stylish Sliding Up Image Description Widget For Blogger.Let's Play with this widget,this widget enable us to add description below image but How? Its not a unique to add description Below image ? Of-course but in this widget the description will be shown when One hover the mouse over the image and the description will be clearly seen.Does it make Sense,its looking Sound Good.With the help of CSS and HTML this widget can be added easily to Blog.

How to Add Stylish Sliding Up Image Description Widget To Blogger

  • Visit Blogger.com
  • Go To Dashboard
  • Now Click On Layout 
  • And Then Click On Add a Gadget
  • A Box will Pop-up
  • Select HTML/JavaScript
  • Now Copy the below Script and made the Necessary changes which is mentioned clearly 
  • Paste it there and that's it !


   Just 


Lorem Ipsum


Lorem ipsum dolor sit amet, consectetuer adipiscing elit, sed diam nonummy..


Blog Post Link ">See More


  • Save it and You are Done !
  • Stay Blessed Happy BlogginG! 

How To Add Multi Tabbed Navigation Widget To Blogger


The Multi Tabbed Navigation Widget enables you to Group all the Blog Gadgets in a single container,which can easily be selected via tabs.The main benefit of this widget is to save the Space of your blog,and you will get rid of scattered gadgets,however it also helps you to navigate the blog gadgets easily.Any one can see blog gadgets in a single container just by Clicking the Tab of the specific Gadget.There are several ways of creating tab-views for blogger like jQuery, or with the help of tools,or any script.

How To Add Tabbed Navigation Widget To Blogger


  • Now Expand the Style Section of the Template,just by Clicking the arrow near  ...  at line 14.
  • Now Search for this Tag ]]>
  • Now just above ]]> tag add the below script
/* ThatsBlogging Tabview for Blogger
----------------------------------------------- */
.tabviewcont{
margin:15px 0;
padding:0;
clear:both;
}
.tabviewnav {
margin: 0 0 0 14px;
padding:3px 0; /* If you are using a Blogger Template change 0 with 15px */
font-size:12px; /* Font size of text inside tabs */
font-weight:bold;
}
.tabviewnav li {
list-style:none;
margin:0;
display:inline;
}
.tabviewnav li a {
padding:3px 6px;
margin-right:1px;
background:#F6F6F6; /* The background color of the tabs */
border-radius:5px 5px 0 0;
-moz-border-radius:5px 5px 0 0;
-webkit-border-radius:5px 5px 0 0;
text-decoration:none;
color:#222222;
}
.tabviewnav li a:hover {
color:#222222;
background:#EBEBEB; /* Background color of the tab on mouseover */
text-decoration:none;
}
.tabviewnav li.tabviewactive a,
.tabviewnav li.tabviewactive a:hover {
background:#EBEBEB; /* Background color of the active tab */
color:#222222;
}
.tabviewcont .tabviewtab {
padding:5px;
border:1px solid #EEEEEE; /* Border around the container */
background:#fff; /* The background color of the gadget */
}
.tabviewcont .tabviewtab h2,
.tabviewcont .tabviewtabhide {
display:none;
}
.tabviewtab .widget-content ul{
list-style:none;
margin:0 0 10px 0;
padding:0;
}
.tabviewtab .widget-content li {
border-bottom:1px solid #ccc;
margin:0 5px;
padding:2px 0 5px 0;
}


  • Now find Tag
  • Now Copy The Below Script and paste it above Tag
  • Now Search for 
    or 
  • Now Paste The Following Script Just above this Script 


  •  And That's it,Now Go To Layout Section,you will see there 3 New Areas for adding Gadgets.

Changes and Implementation 

If you want to add any Gadget to the list of single Container,just Click On Add a Gadget,and Drag the Gadget to that section.Now if you are interested in adding more Tabs,then follow the below steps.
  • In the Above last one step we have highlighted 
 ,now if you want to add new tab just add the below script before 
 Tag,and that's it.


  • Note : If you are adding new tab,then use different ID for each tab,e.g for tab 6 use "Tab6" in the script.
  • Next Important Point is that if your Template sidebar is too short they don't add long and high width Gadget to this Widget.
  • ! important ! : This Widget may slow your Blog Loading Speed, because this widget is lil bit heavy.
  • Note:- If your Blog Sidebars is too short it will not work perfect,either it will just show title or nothing 
So What's Up :- How Was the Widget?You will Like it to Add into your Blog?Share your Beautiful ideas with us.Stay Blessed,Happy Blogging. 

How To Add Related Posts Widget With Thumbnails To Blogger

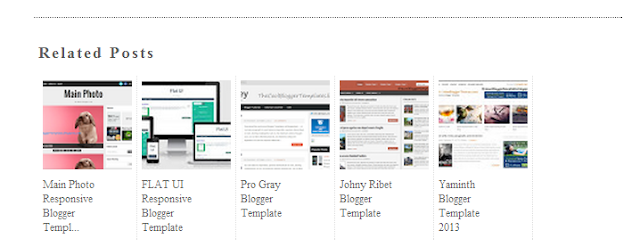
Time to boost your blog page-views,here is incredible hack via which you can show the related posts to blog article below every Blog post,along with beautiful thumbnails.The data for related posts are fetched from Blog Labels and different posts.Applying this hack will help you to host your visitors with great luxury,as a result he will remain long time on your blog seeing different interesting related articles. 
related-posts-widget-for-blogger

How To Add Related Posts Widget With Thumbnails To Blogger


  • Go To Blogger Dashboard
  • Click On template and Then Click On edit HTML
  • Now Search for Tag
  • Now Copy the below script and paste it above Tag
Blogger Tricks Note:-
-For Displaying more than 4 posts in the widget then change the value of 4 in the script to desired no of posts.
-If you want to display this widget also in Home Page then remove the Blue script from the above script.

  • Now just hit save template and that's it

So What's Up

Adding Related Posts Widget With Thumbnails To Blogger will help you to boost your Blog page-views,actually this post is originally written by HelpLogger,So Script Credit Goes to HelpLogger.If you have any question related this article,must pass comments.Stay Blessed,Happy Blogging.


How To Put a Widget inside a Scroll Box

Maybe you have noticed in several blogs/websites that they have alot of widgets which have just ruined there blog style and space.Now to get rid of these long widgets , you can put them in a Box having a Scroll bar.Any tall widget like Blog Archive etc widgets must be placed in a Scroll box.
This will save your Blog Space and will make your blog easy and navigative for readers.Implementing this Widget will enables you to place your widget content in a Scroll box , so your readers can easily navigate blog contents.In this Scroll box , all titles will be static and can easily be accessed by your Readers.
 

How To Put a Widget inside a Scroll Box

  • Find the Widget ID You want to place it in a Scroll box
  • Visit Blogger Dashboard.
    • Click On Template
    • Edit HTML
    • Search for this Code
    ]]>
    • Now Copy the below Script and add 
      it above this Script ]]>
    /* By thatsBlogging.blogspot.com START */
    #WidgetIdYouWant2PlaceinScrollBox .widget-content {
    height: 200px;
    overflow: auto;
    }
    /* END */  
    • Replace WidgetIdYouWant2PlaceinScrollBox  
      with Widget ID >>Save Template and that's it!

      So What's Up : If You have Any Question regarding this Tut ,
      ask freely we are here to reply! Stay Blessed ,Happy Blogging!

How To Expand Widget Templates in New HTML Editor

After the launching of New HTML Editor , Every One is Confused What To Do? How To Use New HTML Editor ? It's Quite Simple and easy,but One Question which mostly I saw in Comments was How To Expand Widget Templates in New HTML Editor? It's Not a big Deal But Let me clear it first What is Expand Widget Template? Actually "Expand Widget Templates" was an option in Old HTML Editor.By Default Old HTML Editor only shows the core code and hides the widgets Code,By Enabling this Option You Can easily Edit any Blogger Template.All Template Core Code along-with Widgets Code will be shown when you check "Expand Widget templates" Option.

Where Is Expand Widget Templates

There is no Option for Expanding Widget Templates in New HTML Editor.Because All the Codes have been shown in the New Editor,that's why You Don't Need to Expand that Code any more.In New HTML Editor all widgets have been folded,A Widget Code Section which has been folded is identified by a bold fold marker i.e arrow symbol ?,near next to the line Number.Whenever You Click on this Arrow symbol ,the concealed widget code section is revealed.
New-Html-Editor

How To Expand Widget In New HTML Editor

As we mentioned above there is no option to expand the templates in New HTML Editor however the Code has been folded and we can easily reveal that code just by Clicking the arrow mentioned above.

How To Search For A Specific Section

It is very Simple to search for a line , tag or any word in new HTML editor.First of all Click between the Code/Script of Template>>Now Press CTRL+F >> A Box will pop-up at Top right side>> Enter the desire text , tag or any character you want to search in the template Coding.Moreover if the Tag is in folded Code,by searching it will automatically reveal from concealed widget.

Directly Go To Widget Code

You Can Directly jump to a widget Code in New HTML Editor.All You have to do is use Jump To Widget feature to easily and quickly locate the desired location/Code.After finding the widget Click on ? to expand the widget before editing.
So What's Up: Still Confuse in Using New HTML editor? Ask Any Question Freely,we are here to help you in any Problem,Stay Blessed,Happy Blogging!

How To Add 5 Star Rating Widget To Blogger


Getting positive feedback from visitors and blog readers enable you to get fame.The Stronger your feedback is the more your blog visitors will be happy.5 Start Rating Widget is an awesome source of getting feedback and Positive response from your readers,this widget show 5 stars at the top or below the blog post,where one can rate your blog article.This Widget also show the total number of views of the article along with the number of votes.You can rate an article by Selecting and Clicking the 5 stars at Once.Actually this Blog has no effect on Blog Loading Speed.

How To Add 5 Star Rating Widget To Blogger


  • First of all Go To Blogger Dashboard
  • Then Click On Template >> Edit HTML
  • Now search for tag
  • After Finding the Head Tag Copy the below Script and paste it just above it or before it.


  • After Implementing the above steps search for this Code  
  • Now Copy the Below Code and paste it just above/below


,
Rate this posting:
{[['<img src="http://static.graddit.com/img/star.png"/>']]}

  • Hit Save Template and that's it 

Important to Note

This Widget Provide two option i.e you want to show it before Blog Post or below Blog Post,Actually i will prefer the below section because when readers read your article at the end they decide how was the article.So for adding it Below the Blog Posts Copy the Above Script and paste it below ,and if you are interested in showing it above the Blog post so do the above steps and paste the copied script above .
-If you are using Magazine Style Blogger Template or Responsive Blogger Template,then you have to Copy the above Script and paste it below/above as many times as it is in the Template HTML.

So What's Up:- This Widget can impress your blog readers but if you have a good feedback,however it doesn't slow down the blog loading speed,Stay Blessed,Happy Blogging.
 
Support :
Copyright © 2011. Comment ça marche - All Rights Reserved