Social Networks is the backbone for your Blog Traffic.Never underestimate the strength of Social Networking Websites,actually every social networking website is getting million of hits daily,and if you share your blog post/content there,then surely you can get a flood of traffic to your Blog.Now every Blogger is sick of posting his/her blog posts daily to Facebook,Twitter or other social networking sites,but here we have found an awesome trick via which you can Automatically Publish Your Blogger Posts to Facebook,Twitter, or any Other Social networking website.For installing this Service follow the below easy steps.


Question :- How to Apply this Service for Google +?
Answer :- Actually Now when you post a Content on your blog,after Publishing Blogger Ask you for sharing that Post to Google + ,means they Provide this feature builtinly.

How To Automatically Publish Blogger Posts To Facebook and Other Social Sites
- Visit DLVR.it
- Now Sign up there,by filling the form with required Data

- After Entering Email and Password , click on Sign Up.
- Now Go To Your email inbox and Confirm your Email Address
- Now it will redirect you to another Page where you have to enter your Blog Feed Burner Username

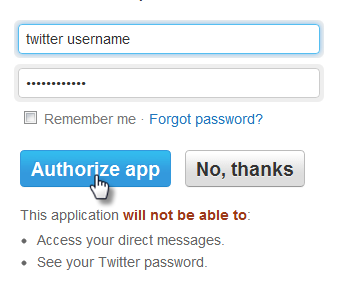
- Click On Twitter Icon at the right side,Now it will redirect you to twitter account,there enter E-mail and Password and Click on Authorize App
- Now your Blog Posts will Automatically Publish to your Twitter Account
- Now For Facebook Click On The Facebook Icon at the right side,it will redirect you to Facebook,there enter your username and password,after that they may ask you about Page username i.e Fan Page
- Enter that and Save Changes
So What's Up
Automatically Publishing Blogger Posts to Social Networking Sites will certainly help you to generate a flood of traffic to your Blog,as i mentioned never underestimate the Social Websites,because you can get alot of traffic to your Blog,However if you apply this service to your Blog,i am sure you will get high traffic.
Question :- How to Apply this Service for Google +?
Answer :- Actually Now when you post a Content on your blog,after Publishing Blogger Ask you for sharing that Post to Google + ,means they Provide this feature builtinly.


